Suitable for tiles with high water absorption such as terracotta tile and ceramic tile, and low water absorption tiles such as mosaic, porcelain and Granito
Ideal for marble and granito up to 60×80 cm (for flooring)
Reduces the work steps by eliminating the immersion process,
Excellent adhesion strength
Tough texture with long setting time for tile alignment
Good adhesion, durable, and not peeling off
Suitable for both floor and wall
Ideal for indoor and outdoor applications
Area Coverage (sq.m./bag)
Size of notched trowel
3 mm
6 mm
9 mm
12 mm
Approximate area coverage
12 sq.m.
6 sq.m.
4 sq.m.
3 sq.m.
Pack Size: 20 kg/bag
INSTRUCTIONS
CATALOG
MORTAR CALCULATION
INSTRUCTIONS
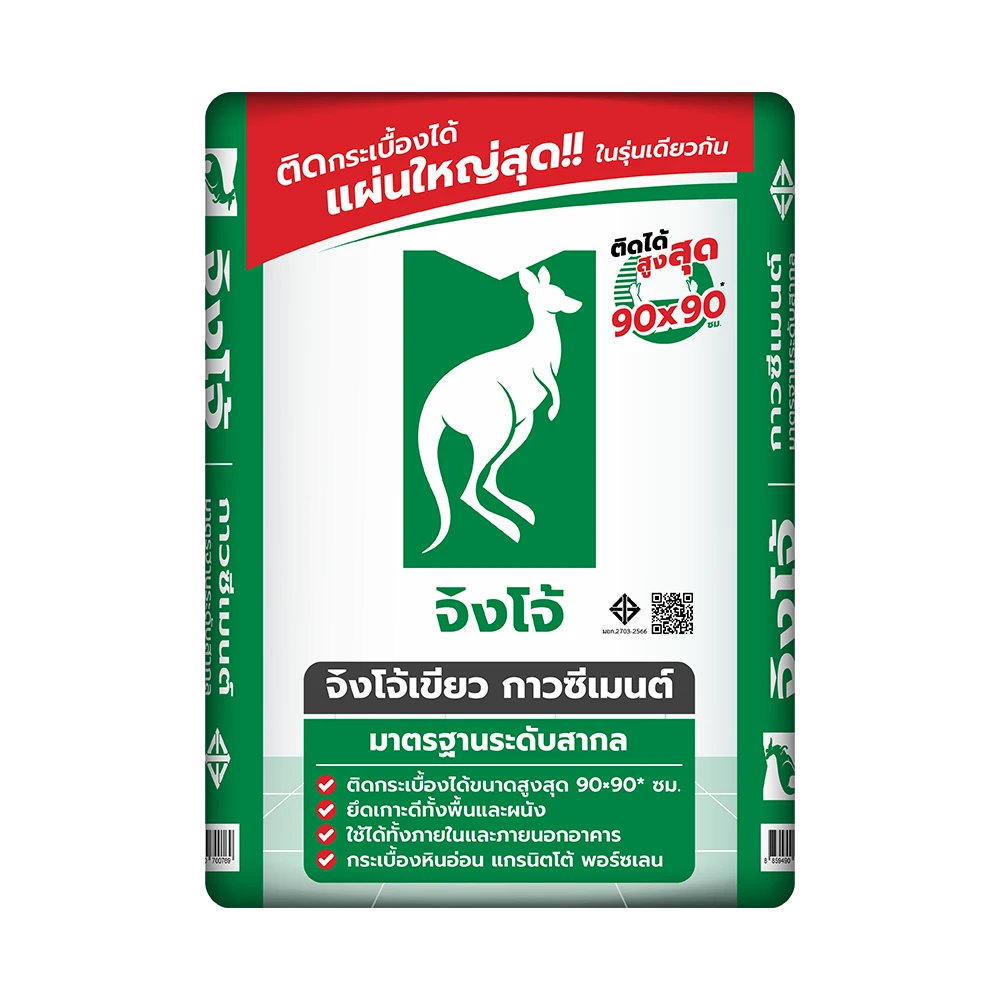
International standard GREEN KANGAROO Standard Tile Adhesive Mortar can tile up to 90×90* cm. Can be used immediatedly when mixed with water in a specified ratio. Reduce the work steps by eliminating the immersion process. Suitable for tiles with high water absorption such as terracotta tile, ceramic tile, and lower water absorption such as mosaic, porcelain and granito. Ideal for indoor and outdoor applications. Excellent adhesion strength, tough texture with long setting time for tile alignment. Good adhesion, durable, and not peeling off.
Surface Preparations
Clean and dry the tiles before installation (do not soak the tiles in water).
For newly plastered or leveled surfaces, allow a curing time of at least 7 days.
The surface to be tiled must be smooth and strong with no cracks.
In case of wet areas such as bathrooms and kitchens, it is recommended to install a waterproofing system before tiling to prevent water leakage.
If the surface has been painted, remove the painting before tiling.
Before tiling, draw dividing lines to ensure proper alignment.
For the surfaces with roughness and high water absorption, prime the surface with thin layer of water before tiling.
Tile Adhesive Mixing
Mix 20 kilograms (1 bag) of tile adhesive with 5.2 liters of water. Or Mix tile adhesive with water in a ratio of 2.7:1. Mix until it forms a consistent texture without lumps. There are two types of mixtures.
When using an electric mixer, mix for at least 3 minutes until the texture is consistent. Set aside for 5 minutes to allow the chemical reactions. Mix again before use.
When mixing by hands, use trowel to mix thoroughly until the texture is consistent. Set aside for 5 minutes to allow the chemical reactions. Mix again before use.
Work Process
Preparations
Clean and dry the tiles before installation (do not soak the tiles in water).
For newly plastered or leveled surfaces, allow a curing time of at least 7 days.
The surface to be tiled must be smooth and strong with no cracks.
In case of wet areas such as bathrooms and kitchens, it is recommended to install a waterproofing system before tiling to prevent water leakage.
If the surface has been painted, remove the painting before tiling.
Before tiling, draw dividing lines to ensure proper alignment.
For the surfaces with roughness and high water absorption, prime the surface with thin layer of water before tiling.
Tile Installation
Apply the adhesive using a notched trowel according to the size of the tiles in long strokes on the surface area to be tiled, covering approximately 1-2 sq.m. Spread the adhesive evenly, considering the thickness of the notched trowel to control the quantity of adhesive.
Observe the consistency of the adhesive by:
If the adhesive is too runny and does not hold in shape, add more mortar to the mixture.
If the adhesive is too thick and does not spread evenly, add more water to the mixture.
In case of large tiles (60×60 cm), but unable to find a 12 mm notches trowel, a 6 mm notched trowel (available at general building supply store) should be used. Apply additional adhesive on the back of the tiles to ensure full coverage without any air gaps beneath the tiles. Air gaps can cause poor adhesion, fragile tiles, and water leakage.
After applying the adhesive with the notched trowel, wait for approximately 5 minutes for better adhesion.
Place the tiles onto the adhesive, press firmly, and use a rubber mallet to tap the surface of the tiles evenly to ensure proper adhesion between adhesive and the back of the tiles. Maintain a minimum gap of 2 mm between the tiles for grouting (If excess adhesive spills into the grout lines, remove it to maintain grouting space).
If desired, tile alignment can be adjusted within 10-15 minutes before the adhesive dries.
After completing tile installation, allow the adhesive to dry thoroughly for 24 hours before grouting. In case of floor tiling, it is recommended to cure the adhesive for at least 48 hours.
Precautions
Avoid applying the adhesive in small spots after laying the tiles causing the tiles to become fragile and easily broken.
Avoid installing tiles in direct sunlight or surface with high temperatures, as it can reduce the adhesion strength.
The product may cause skin irritation, it is recommended to use safety equipment such as gloves, dust masks and protective eyewear.
If the adhesive comes into contact with skin or face, rinse thoroughly with water and soap.
Storage
Keep in dry and shaded area. – 8 months of shelf life.
Suggestions
Do not soak the tiles in water before installation